Sunday, December 1, 2013

De-Construction Stbd Side

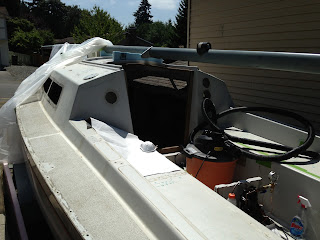
I have removed most of the starboard interior structure with the exception of the primary and secondary bulkheads.  These are nicely glassed to the inner skin and I'll keep this structure intact as the foundation.  I think I will body work the few small holes and will paint the remaining structure.  A little bit of glass work before painting and I think I will reinforce the chain plates.  I will leave the port side intact so I can study and re-create some of the joints.  What's nice is the interior will start trending toward being fixed up.  At times I find the project a bit overwhelming but I am excited to be working on this project.  The core structure is amazing.  I am continually impressed with this boat how far advanced it is for its time.

The shop vac has been working hard.  It is placed out in the cockpit and the hose runs into the interior.  Dust is a continual concern and I'm using a N95 dust mask and the vacuum. I'm able to get good ventilation as well.  Until next time.

 Before

After

Friday, November 29, 2013

Interior


The holiday season has arrived.  I can't believe thanksgiving is over now begins work on the interior.  I am removing the old interior plywood which is a bit weathered.  I have carefully removed the aft starboard quarter berth.  Each screw is buried under epoxy or a wood plug so I'm using the Dremel tool to expose each screw head.  The process is a bit tedious but is necessary to preserve the integrity of using them as templates.  I've removed the aft quarter piece and I've exposed some mold so this process is definitely important.  A slow steady progress will get the interior stripped out.  Then a bit of glass work is the plan followed by a marine polyurethane.  I can tell the interior work ahead will take a couple of weeks.  Here are some pictures of the beginning of the project.


Sunday, November 24, 2013

Main Hatch Fitup

Today I dry fit the main cabin hatch fairing and main hatch sliding part.  I'm not happy with how the hatch is sliding so I will look for some teflon tape that the hatch will run on.  Today I removed half of the tarps and I think I will leave them off.  I find I waste a lot of time taking the tarps on and off.  Today was beautiful the sun was out.  I didn't get a lot done I installed the aft hatch covers.  I am bedding all hardware with 3m 4000, I hope this is something I won't regret.  I am planning on bedding in the toe rail with this stuff.  I decided to take a bunch of pictures today because the lighting was so good.

Above:  The shop.

 Above:  The foredeck patch still requires some long boarding and some polishing  I don't think I will get too carried away because I am planning on covering the patch with some Raptor decking.
 The main cabin hatch fairing with hardware installed.  I need to find a slicker sliding surface and some rubber bumpers for stops.  I will not fasten the fairing until the mechanics are dialed.
Aft hatch covers installed and temporary gasket installed to prevent water ingress in the event of a tarp failure.  She is now watertight and the interior is soon to become the focus.

I bought some teak this weekend as well as some African mahogany.  The plan is to use teak on the exterior and mahogany for parts of the interior.  The teak was 36 bucks a board foot.  I don't want to take any short cuts that we will regret later.  Teak is somewhat heavy and the mahogany is somewhat light.  I think this is the plan for now.  I can install the companion way for now to keep the cats out as well as the heat in for interior work.  I will continue on where Reid left off deconstructing the damaged interior components before building it up.  We'll see where it goes.  For the next post I will take some pictures of the current state of the interior.
Fun stuff.

This weekend we enjoyed a nice lunch with Jon and Marcy Edwards it was great hearing stories from their past as well as sharing our passion for boating and family.  Thanks for the great weekend.  Thanksgiving weekend is just around the corner and I won't get much done this coming week.

Sunday, November 17, 2013

Detail Work

This weekend we celebrated my parent's 50th anniversary.  It was a lot of fun and I think they enjoyed the party.

The progress is steady.  I try to get at least one task done a week.  I am working on the main hatch and I've reinforced the underside of the hatch fairing with a layer of fiberglass and epoxy.  I ground out a small crack and reinforced the high stress areas.  Fiberglass fairing compound will be used to fill in the low spots.  I'll sand it smooth tomorrow and then touch it up with some gel-coat.  While letting the resin cure.  I installed the winch handle pockets today as well as the heel gauge.  I'm now beginning to layout the plans for the interior.  I will use marine plywood for replacing some of the interior panels.  I need to buy some teak for some of the exterior components but it will be very minimal if I use it at all.  I am a bit torn at the idea of using a tropical hardwood.  The cost of teak is staggering and I have not found a good source.  I may travel to Sultan this coming Friday to check out a dealer of teak.  I will also call around to find the lowest cost marine plywood.  It is 69 dollars a sheet at Crosscut hardwoods.  It would be around 100 dollars for the minimal teak I need from Crosscut.  I have recycled pretty much all of the teak.  I think for the interior trim I will use cherry.

Tuesday, November 12, 2013

Main Hatch

The cabin top hatch and the sliding hatch cover are in pretty good condition.  A little bit of green algae.  I have given the hatches a good scrubbing with a little soft scrub with bleach and the pieces are looking clean.  All of the hardware that was removed has been lined up and these will be cleaned and polished as well.  I will prep the damaged glass with tapered bevels and then I'm planning on using fiberglass fairing compound to fill in the rope burns.  I will then use some color matched gel-coat to clean up the small blemishes but I'll be careful to avoid getting carried away.

I still need to locate some sandwich panel for the lower companion way.  If I get in a bind I'll make one out of marine plywood for the time being.  I need to buy some marine plywood for the interior projects.  Just like on the exterior projects it is slow and steady progress.

Sunday, November 10, 2013

Cabin Windows and Deck Hatch Installed

The windows and the fore-deck hatch are installed.  Yay!  It was a lot of prep-work for the new cabin windows but like anything you spend extra attention to the end result is good.  I couldn't be happier with how they turned out.  It pretty much took us most of the weekend to install them.  The weather cooperated down to the minute.  The temperature outside was about 50 degrees right on the borderline for what is acceptable for Sikaflex.  After dry fitting the windows I masked both the windows and the hull allowing for a small cap bead of adhesive.  Jilann and myself tag teamed the installation while Sally watched Emily.  We used #8 countersunk screws that are hex driven so the look would be closer to a rivet for the finished look.  On the interior I used fender washers to spread out the clamping load with a low profile nylocks.  A small space heater helped boost the interior temperature aiding in curing.

After we bonded in the windows it started to rain lightly.  Just in the nick of time.  We will let the windows cure for a day and then the forward hatch will be installed.

 The below pictures are a day later and the masking is ready for removal.

Jilann removing the protective covering.  This is the best part.


The tint of the windows is perfect and matches the tint of the forward deck hatch.  The fore-deck patch is not finished yet but pretty close.  The long process of fairing it smooth.  The plan is installing Raptor decking.

Now all major holes in the deck have been filled.  I have aluminum tape over all exposed holes and I used some vacuum bagging material and butyl tape to seal the electrical pass through for the mast electrical.  If anybody out there needs window templates for a Ross 780 let me know I will hook you up.

The process was long creating something from nothing:
(Paper templates, traced cutouts, digitized with a faro arm, manipulated in the computer, 1:1 templates, transferred holes to templates, templates to Clearcut Plastics, they made router trim fixture, parts made, and added c'sinks, get parts two weeks later, dry fit, mark boat, scribe paper backing, remove windows, Exact-o knife out paper backing perimeter, mask boat, prime the bonding surface of the window with fifty dollar primer, wait thirty minutes, apply Sikaflex to boat in a pyramid shape to ensure no air bubbles upon squeeze out, position window and align holes, add fasteners, squeeze out material, make mess, get some on clothes, add tiny cap bead, clean up mess, watch adhesive dry, sit on heating pad)

Removing the masking was the best part and the windows and forward deck hatch look great.  The forward cutout I believe was designed for a Bowmar hatch but I found a Lewmar hatch that will work great from Fisheries Supply.  Thanks again Paul.  I do like the quality of the Lewmar hatch and the features as well.  I will take some pictures after the adhesive dries.  The good thing now is the boat is getting sealed up and I can run a small space heater in the inside of the boat.  I will also sleep better knowing that I am not dependent on some flimsy tarps.  A week ago we had 50 mph winds and the tarps were getting worked.

Now on to the main companion way hatch.  I have to reinforce the hatch with a little epoxy and some fiberglass fairing compound and gel-coat.  I am gearing up for the interior improvements as well and I have found a good source for the marine Plywood, thank you Simon.

Spring time will be here before we know it and we will be ready to sail.  For now we are ready for the winter and the race against the weather is over.


Monday, November 4, 2013

Windows Cont'd

The windows dry fit great and I have scribed and prepared the Acrylic and I will be using the Sikaflex 295i sealant for bonding and mechanically fastening the windows.  They look great and I will get these in as soon as possible.  After this I am planning on bonding in the forward Lewmar deck hatch.  All of the hard points are in the deck.  The next step will be re-building and detailing the main hatch.  It's funny one task leads into the next and she is starting to look ship shape.

Jilann is working on re-finishing the teak and I'm excited to see how this turns out.  I'm sure it will turn out beautiful because she is so attentive to detail.

I need to buy a new band saw blade and get ready for the creation of some new interior components.  The forward deck part I built this summer took the teeth right off the blade in the form of sparks.  I didn't think cured fiberglass was all that strong.  The forward patch was pretty substantial but I do not want to have any issues when I bend the mast back in breeze.  It is exciting to read other Ross 780 blogs and I appreciate the connections I have made down south in New Zealand.

Sunday, November 3, 2013

Cabin Windows

The cabin windows have been made.  I'm excited to assemble them to the hull.  After a business trip to Italy, sailboat racing on the sound for Grand Prix and time spent with Jilann and Emily I have a free day to get some work done.  I will dry fit the windows today and perhaps bond them into place.  The forward deck hatch is ready to be installed.  It is critical to have her buttoned up before winter weather is fully here.  Then I will be able to focus on re-creating and customizing the interior.  Now begins the slow steady progress to completion be spring time.

I am excited to have the opportunity to work on a project like this and I'm looking forward to how this boat will change our lives.

Tuesday, October 15, 2013

Gel coating, glad to be at this point!

The gel coating of the foredeck is going well.  I need a spray gun the sanding is getting old.  I will sand until all of the brush strokes are gone. Brushing and tipping is over rated and does not work very well.  The color match is as good as expected and I'm glad it is as close as it is.  The windows are on order with Clear Cut Plastics I know they will turn out well and I'm looking forward to having some help from my friend Rd installing them.   Thanks to  Nate Creits I'm planning on taking this project on slow so that it turns out well.  Blizzard will in short order be water tight.  I think it will take another two weeks of work before it is tight.  Then I'll be able to focus on the interior layout.  This week I'll be spending sanding and spending time with Inchie and my beautiful wife.  Off to Italy Friday for work which will be nice.

It is nice to meet a fellow Ross 780 from New Zealand.  Thanks Phil for reaching out your boat is looking awesome.  I'm looking forward to figuring this beautiful boat out.

Here s a picture from earlier in the week.  Late night curing of gelcoat.  It is a mad scramble before the weather completely turns.

Saturday, October 5, 2013

Window Templates

The boat is looking better each week.  Here is a picture before the gelcoating. The topsides are buffed out and the foredeck patch is in position and body worked smooth.  I have my own custom paint named for me; Guard Grey Andrew Olseene...Hopefully it matches up.

The mast base is installed and the paper plotted window templates are being fitted.  I traced the existing window cutouts on paper and then digitized it on the inspection rock at work with the faro arm.  I can tell the windows will be a time consuming process to do it right but it will be well worth the patience.

Monday, September 30, 2013

Rain has Arrived

I have discovered that almost every small project I work on takes about twice as long to complete.  I want the restoration to turn out well and I'm enjoying every part of it.  I don't want to rush a good thing.  So I have installed the foredeck and I have laminated the joint together with tapering plies and then covered most of it in chop strand matte.  I then have used a fiberglass fairing compound smoothing the whole exterior surface.  It looks good and I have bought a quart of color matched gelcoat soon ready to apply temperature pending.  The weather is too cold right now to go to town with resin so I've began to focus my attention elsewhere.  I have installed the beautifully powdercoated mast base (Thanks Commercial Powdercoating of Bend OR).  All of the hard points are installed in the deck.  I guess the lesson I learn over and over is that good preparation results in good results.  Also the adrenaline rush in mixing up resin is a bit exciting.  I don't want to screw a repair up.  I get nervous and I'm against the clock for the material kicking off.  I have learned and am learning to calm myself and not worry about the result but to pay a little extra time to finish the job tightly without making a mess of it.  I like working with fiberglass because you can take a risk, possible make a mistake with the worst case scenario equals a do-over with a bit of work with a grinder.

I have buffed out the topsides with Perfect It polishing compound.  This is easy to do with a machine buffer.  The gelcoat is in excellent condition under the oxidation and I have discovered a few areas that will require some repair but for the most part the majority of the gelcoat is in good condition.  The non-skid has been cleaned and the cabin top has been buffed out.  Tomorrow I'll be laying out the window cutout templates with a Faro arm at lunch.

I will try to include some before and after pictures.  But below are a few of the current state of the project.


Starboard topside showing reflection, note the dog gate.  Dory is a nice companion chilling out.


Mast base and compression post, ready for install.

Autopilot for the tiller, Thanks Kieth Seiler!

Monday, September 2, 2013

Swab the Decks

Today was a great productive day.  A special thanks goes out to Jilann and Sally and RD as well as Meh-meh (Megan) for watching Inchy (Emily).  Today we taped up all of the holes in the deck with aluminum tape.  This stuff seals well and is easy to remove without leaving adhesive.  The deck was covered in a splotchy mold and years of dirt so we gave her a bath and she cleaned up well.


Above:  Jilann and Sally scrubbing the decks.

Rd came over and we all cleaned for about two hours.  Soft scrub with bleach worked well on the non-skid.  The smooth areas will get cleaned with the machine buffer and a polishing compound.  We have completed about the first quarter of the port bow with the machine buffer and the gelcoat overall is in great condition.  This weekend a lot got done.  The foredeck patch is installed and I used similar aluminum rivets to tie it into the return flange mechanically.  I will be spending much of this week glassing in the forward and aft sections and will begin the fairing process.  The glass work is a lot of building up and tearing down.  To finish up the bow I plan to add multiple layers of 6oz glass and will tie in the seams.  I am planning on alternating the ply orientation by 45 degrees with layers of mat in between for good adhesion.  The foredeck is not perfect but very close for the fit.  I will use fiberglass fairing compound to get it perfect before gelcoating.  The reason for the rivets and structural putty rather than 5200 is that my plan is to match the stiffness of the surrounding structure.  I will overkill the fiberglass on the inside and will put the vacuum pump to work this week.  The last thing I want happening is for stress cracks to appear in the gelcoat when we bend the mast aft and tighten up the forestay while going upwind in heavy air.
The foredeck is installed, the decks are bright white, and the topsides are getting polished out.  You can see reflections in the gelcoat.  The solar vent is getting installed.  I am testing out the de-coreing process of all deck penetrations.  I am using a step drill from below then I remove the balsa with a dental tool.  I then tape the hole from the inside and inject structural fiberglass putty with a syringe.  I will come back and create a clearance hole through the hard point.  I think I will try epoxy for the other hard points but I will keep them on the small side so they do not generate too much heat and crack when curing.  The plan is to close up the perimeter holes first so she is easier to tarp with the rainy season quickly approaching.  I have to finish the foredeck before the toe-rails can be re-attached.

Acetone, I love you and hate you.  I have used this solvent to clean up the resin that has glued my arm hairs together and it is great, beats a razor.  I also have gotten some on my expensive black diamond head lamp and I managed to spill a small amount on the display of my digital scale, nice now I can barely read it.  I should be able to polish it out.


Saturday, August 31, 2013

Foredeck Patch

Today I bonded in the foredeck.  With a little help from Sally and Jilann, Thanks!  The part didn't fit perfect but good enough.  I can trim and fair the thing in tomorrow.  We had terrific ribs tonight followed by a rum and coke and then the three of us glued that part in the best we could.  I think it'll turn out great.  I'll fair that piece in tomorrow, throw in a couple of layers of glass to secure everything in and we will be good to go for gel coating.  I should have gotten a picture.  Sally surfing the bow and Jilann doing her best filling in the gaps while I added a few aluminum rivets to tie flanges together.
Until tomorrow.  It is good to have this hole filled and ready to make some good progress.  The weather this weekend is awesome.

Saturday, August 24, 2013

Making the Foredeck

Today I laid up the foredeck with Jilann.  It was nice to have an extra set of hands and she was very helpful.  It looks pretty good and is still curing.  I hope I got the proportion of hardener to resin right.  I toasted the suction hose with resin and had to throw it away and I created a bunch of work for using too much resin.

Better safe than sorry though the part is dense with resin which is alright the part should be cured by tomorrow.


I also built a framework for the tarp today that will allow me to work on the deck while the tarp is on, maybe.

Wednesday, August 21, 2013

Foredeck Surface Mold and Core

I
It doesn't look like much but this is the foredeck core and improvised deck mold.  I used thin plywood to capture the exterior shape of the deck.  Then froze that shape with five layers of glass.  The surface is then sealed with carefully laid out packaging tape.  Tomorrow is glassing and bagging the assembly together.  For some reason I had one of the chamfers backward in my head and had to trim the balsa more than once to get it right.  A little hot glue to keep the small pieces together.  The plan is 2-core-2 with heavy woven glass.  Then 555 resin.  I also printed out the blank templates that will be used for tracing the main cabin cutouts.  Smoked Acrylic is the current plan here.  A thanks goes out to Paul Patterson at Fisheries for hooking me up with an account and in general helping me out a bunch.  (The 3m marine specialist)

Sunday, August 18, 2013

Farewell Ranger Minto

Goodbye Minto.  You have taught me much.  The money you bring in will be used wisely.

Saturday, August 17, 2013

Foredeck repair before

Here goes nothing.  Today I will take on the the foredeck cutout that needs patching.  I have made some fairing sticks to pick up the compound curvature of the deck.

Scrap the fairing stick approach. To do this foredeck right I have decided to create a basic mold of the exterior surface of the deck.  It will take longer but the results in the end should be better.  I will update this post with pictures as this develops.  A successful trip to fisheries and I now have a solar vent and other small inspection ports to fill up an open hole in the cockpit that once housed a manual bilge pump.  My goal is to get her watertight before fall is here. Today I heard from a dear friend Jonathan with encouragement.  I look forward to getting out there and working tactics like we did on the Blake Island race two years ago...Until tomorrow.

Friday, August 16, 2013

Let the Blog Begin

The restoration of Blizzard thus far has been great, a little harder than anticipated but well worth the effort.  This is the beginning of the blog but I have been at it now for over a month and I'm please with the progress.  I've completed the de-coring of the cockpit on both the starboard and port sides.  The dust, heat, and fatigue while working overhead was quite challenging and I'm glad to have this behind me.  The decay of the core was actually pretty minimal but it is good to have this removed because it would have only gotten worse.  I have bonded the new core into place and I've encapsulated it with two heavy layers of glass which is a combination of unidirectional and layers of matte.  This material was a life saver and I have learned how to glass overhead.  The patchwork method has worked well and was really the only way it could be effectively done.  The homemade vacuum pump is doing it's job.


Today the Audi sold....  Bitter sweet but now on to a truck which I'm looking forward to.

Tomorrow I begin to the process of repairing the foredeck.  The deck has been prepared.  Looking forward to a weekend of great progress!